
Beach photography presents digital camera owners with a number of wonderful opportunities as they are places of natural beauty, colour and interesting light. However, they also present a variety of challenges including camera damage, privacy issues and making large open spaces interesting. Here are a few quick tips on beach photography to get you ready for your next seaside trip.
1. Be Early or Be Late
In general, the best photos you will capture at the beach will generally be taken before (or after) the light becomes too powerful. Although this is just a small piece of advice, don’t regard it as unimportant, shooting at the right time on a beach can get you some stunning photographs and is much much easier than shooting at the wrong time when the sun is high.
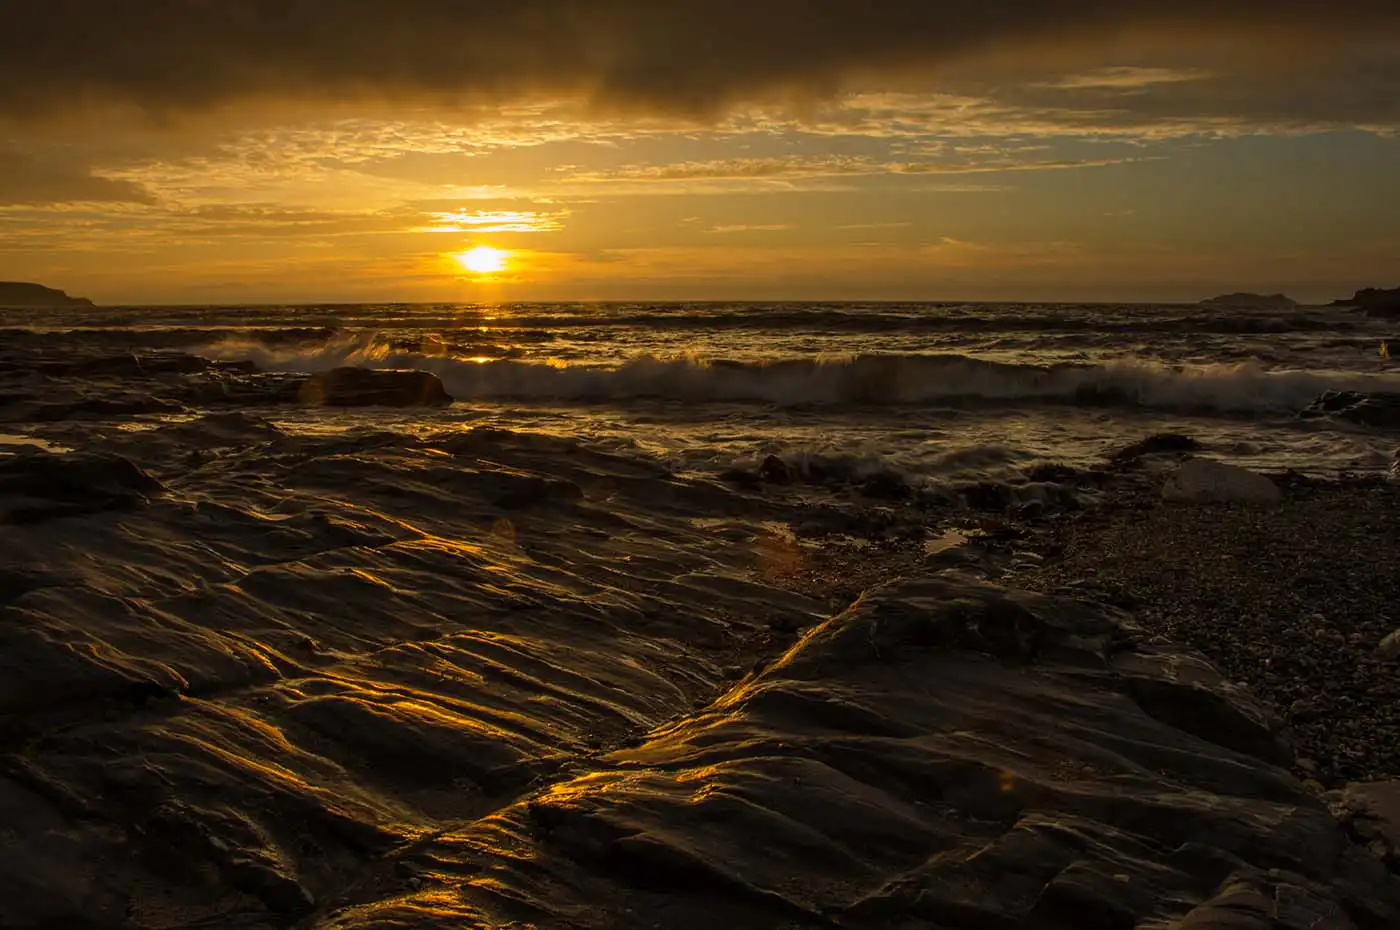
The below Newtrain Bay image was taken at sunset and you have the foreground rocks and waves coming in.
Now, it’s not always possible to get to the beach early enough though, so let’s look at some tips for photography at the beach when the sun is blaring and things are bright.
2. Know The Limitations of Auto
If you’re shooting in auto mode at the beach in the bright sun, your camera will probably be predisposed to under-exposing your images. If you’re having problems with the auto setting, then switch to manual and experiment with your exposure settings.

Now that you’re off auto mode, let’s cover some manual setting issues:
3. Mind Your Exposure Settings
A beach during the day throws up all types of exposure problems. Basically, it’s really really bright, generally, in such bright conditions, you’re going to need a low ISO setting (think 100 or 200) in combination with a narrow aperture (somewhere between (f14 and f22) with a moderately fast shutter speed.
If you want a narrower depth of field (for a portrait for example), then you will need to open up the aperture and make the shutter speed a lot faster. It’s difficult to generalise about camera settings, so that takes us to our next point…
4. Consider Filters
There are two filters that you might want to consider using if you have access to them.
- An ND filter will allow you to reduce the intensity of light hitting your camera’s sensor.
- A polarising filter will reduce reflections and help darken the sky
5. Don’t Forget Flash
if you’re shooting people and faces when the background is really bright, then you might need a little fill light to make sure the faces aren’t underexposed. The flash will not trigger automatically and you will need to force the flash to fire in this situation.
If you don’t have access to a flash then any white or reflective material may help bounce light back.
6. Consider a Tripod

For landscapes in challenging light then a stable camera becomes essential so that you can play with long exposure times. Although a tripod is always the best option you can use whatever you have available like a jumper or towel on a rock or wall.
We hope that the above tips will help you capture the holiday moments for longer. And if you got some stunning snaps, then please post them on our Coast Radar Facebook page!